Categories
Dessert

Don’t let supply chain issues make you snap

This cranberry orange tart is made with fresh fruit and is surrounded by a spicy gingersnap crust. The flavors are perfect for the holidays.

In 1973, late-night host Johnny Carson made a joke about a supposed toilet paper shortage during his opening monologue.

That joke, along with some press releases from a member of Congress, led to an actual toilet paper shortage as people cleaned stores out and the empty shelves reinforced the rumor.

Right now, it seems supply chain problems are causing some of those same issues. I can’t possibly be the only person this year who spent good money on some name-brand pureed pumpkin when the generic brand was out just in case there wasn’t some on the shelves before Thanksgiving.

And another victim of current shortages is one I wouldn’t have been able to predict: gingersnaps.

Now, I have no official data to back up my claim that there’s a shortage of gingersnaps out there, but I can tell you I ended up at four different local stores before I finally found some for this week’s recipe. They’re out there. You just have to do a little sleuthing to find them.

But I will tell you that this week’s recipe is not only a dessert tailor-made for the holidays, but it’s worth driving all around town to find the ingredients.

The recipe I tried comes from the blog “All Purpose Flour Child” by Taylor Harbin. You can find her original post at http://www.allpurposeflourchild.com/blog/cranberry-orange-curd-gingersnap-tart. I added extra cinnamon in my version.

Print

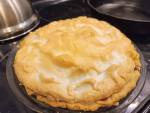
Cranberry Orange Gingersnap Tart

This cranberry orange tart is made with fresh fruit and is surrounded by a spicy gingersnap crust. The flavors are perfect for the holidays.
Course Dessert
Keyword Christmas, cinnamon, cranberry, fresh fruit, gingersnaps, orange, tart, Thanksgiving

Ingredients

Crust Ingredients

  • 12 ounces gingersnap cookies
  • 2 teaspoons cinnamon
  • 1/8 teaspoon salt
  • 4 tablespoons butter
  • 1 tablespoon molasses

Filling Ingredients

  • 12 ounces whole fresh cranberries
  • 1/4 cup freshly-squeezed orange juice
  • 3/4 cup sugar
  • 4 egg yolks
  • zest of 1 large orange
  • 4 tablespoons butter

Instructions

  • Preheat the oven to 350 degrees.
  • Place the gingersnaps in a food processor and process until they are in fine crumbs. Pulse in the cinnamon and salt. In a small, microwave-safe bowl, melt the butter in the microwave. Stir in the molasses until it’s smooth, and then add the mixture to the food processor. Pulse until everything is well combined.
  • Dump the crust mixture into a 12-inch tart pan (you can substitute a deep pie pan or a springform pan). Press the mixture with the bottom of a glass or measuring cup to spread it evenly, making sure to press it up the sides of the pan.
  • Bake for 12 to 15 minutes or until the crust is golden. Set it aside.
  • For the filling, combine the cranberries with 1/4 cup water and the orange juice in a saucepan. Cover the mixture and let it cook for about 15 minutes or until the cranberries are soft.
  • Position a fine mesh strainer over a bowl and drain the cranberries into it, pressing to get the puree into the bowl and leaving the berry skins in the strainer. Once you’re finished, return the puree to the saucepan.
  • In another bowl, whisk the egg yolks and sugar until the mixture is a pale yellow.
  • Add a little of the hot cranberry puree into the egg mixture and stir to temper the eggs, and then dump all of it into the saucepan over medium heat.
  • Whisk constantly until the mixture thickens enough to coat the back of a spoon.
  • Remove the pan from the heat and stir in the butter and orange zest. Continue stirring until the butter is melted and the mixture is smooth.
  • Pour the filling into the prepared crust and smooth it out. Chill it in the refrigerator until it’s set (30 minutes to an hour), and serve.

This is a gorgeous dessert, and the orange and cranberry are a perfect combination with the warm spices in the crust. The filling has a bit of a tartness to it, which is an especially nice flavor profile when there are tons of sweets around.

And if you’re in a bind, you can totally substitute in some vanilla wafers or graham crackers for this crust—as long as they don’t fall victim to shortages, too.

But at least it’s just cookies we’re having trouble getting ahold of. The last thing we need right before having people over for the holidays is a toilet paper shortage.

This piece first appeared in print on Nov. 18, 2021.

Spice Up Your Life is a weekly newspaper column written by Lindsey Young in south central Kansas. If you are interested in sponsoring this column, please contact us through the “Contact Lindsey” link at the top of the page.

Categories
Dessert

‘Choc’ this recipe up to a new pan purchase

A bittersweet chocolate pumpkin tart is a great holiday recipe, along with having deep, rich flavor that makes small pieces the default serving size.

After years of saying I was going to do it, I finally took the plunge last week: I bought a tart pan.

If you remember, I made miniature tarts earlier this year, aided by a cookie cutter and a cupcake tin, and that really pushed me towards making my ultimate purchase.

I’ve been staring at the tart pans in our local kitchen store for months, trying to decide if I really needed one as much as I thought I did.

In the end, I bought two different sizes. Go big or go home, I guess.

So, with my new purchase, it will be no surprise that I made a tart for this week, and not only was it the perfect flavor combination for Thanksgiving, but it was delicious, too.

The recipe I tried comes from the blog “Love & Olive Oil” by Lindsay Landis. You can find the original post at https://www.loveandoliveoil.com/2015/11/bittersweet-chocolate-pumpkin-tart.html. I just changed the spices a little bit for my version.

Print

Bittersweet Chocolate Pumpkin Tart

A bittersweet chocolate pumpkin tart is a great holiday recipe, along with having deep, rich flavor that makes small pieces the default serving size.
Course Dessert
Keyword bittersweet chocolate, cinnamon, cloves, fall, ginger, nutmeg, pecans, pumpkin, tart, Thanksgiving, vanilla wafers

Ingredients

Crust Ingredients

  • 8 ounces vanilla wafer cookies
  • 1/2 cup pecans
  • 2 tablespoons brown sugar
  • 1 teaspoon cinnamon
  • 1/8 teaspoon salt
  • 1/4 cup butter melted

Filling Ingredients

  • 3/4 cup heavy cream
  • 1/4 cup milk I used skim
  • 9 ounces bittersweet chocolate chopped
  • 2 eggs
  • 2/3 cup pureed pumpkin
  • 1 heaping teaspoon cinnamon
  • 1/2 heaping teaspoon ginger
  • 1/4 heaping teaspoon cloves
  • 1/4 teaspoon nutmeg
  • 1 tablespoon bourbon or vanilla

Instructions

  • Preheat the oven to 325 degrees.
  • For the crust, add the cookies and pecans into a food processor and process until the mixture is in small crumbs. Add the sugar, cinnamon, salt and butter, and pulse until the butter is evenly distributed.
  • Pour the crust mixture into a nine-inch tart pan and press with the bottom of a glass or measuring cup to evenly coat the bottom and up the sides. Make sure the crust mixture is firmly pressed together.
  • Put the pan onto a baking sheet and bake the crust for about 10 minutes or until it’s set. Remove the pan the oven and set it aside to cool.
  • Turn the oven down to 250 degrees.
  • Heat a saucepan over low heat, and add the milk and cream. Stir regularly to keep it from scorching on the bottom, and once the milk just starts to bubble a little around the edges of the pan, remove it from the heat and stir in the chocolate, continuing to stir until the chocolate is completely melted.
  • In a mixing bowl, combine the eggs, pumpkin puree, cinnamon, ginger, cloves and nutmeg, and stir until it’s well combined.
  • Add about one-fourth cup of the chocolate mixture into the pumpkin mixture to temper the eggs. Add the rest of the chocolate mixture, stirring well. Finish it out by adding the bourbon or vanilla extract and stirring again.
  • Pour the mixture into the prepared crust and bake on the baking sheet for 30 to 35 minutes or until the tart is just barely jiggly in the middle. Remove the tart from the oven and let it cool completely before serving.
  • Store any leftovers in the refrigerator.

This was intensely rich and not overly sweet. I used a 62 percent cacao chocolate for my version, and I really liked the darker chocolate flavor. The pumpkin is definitely there but not the dominant flavor. I would recommend cutting this in smaller slices. You don’t need a lot of it to feel satisfied.

If you don’t have a tart pan, you could easily substitute in a springform pan or just use a pie pan, too.

I must say, though, I really liked my pretty scalloped edges on my tart. It made me feel like a real baker, despite this being a fairly easy recipe overall.

I’m not sure what kitchen store product will be the next I’ll be pining after, but for now, my friends, family and coworkers better be excited for some new tart experiments.

This piece first appeared in print on Nov. 11, 2021.

Spice Up Your Life is a weekly newspaper column written by Lindsey Young in south central Kansas. If you are interested in sponsoring this column, please contact us through the “Contact Lindsey” link at the top of the page.

Categories
Dessert Snack

The Sweet Granada’s avalanche bark truly rocks

Avalanche bark has a great texture, with crunchy rice cereal, fluffy marshmallows and chocolate chunks, along with the flavor of peanut butter.

I used to love field trips as a kid—visiting the Wichita Art Museum, the Kansas Cosmosphere, the zoo, the Kansas State Fair, etc.

It was always an adventure in a new place, and I’m the type of person who enjoys learning something new whenever possible.

As an adult, you don’t seem to get to do field trips as often, so when Joey told me we were going to go to Emporia to visit his new friend Kim, owner of The Sweet Granada: A Chocolate Cafe, he didn’t have to do any convincing for me to jump in the car.

Joey recently met Kim through a small business group, and she invited us to come hang out for a bit and see her operation.

Guys.

There. Was. Chocolate. Everywhere.

It was amazing.

When you walk in, you’re hit with a smell wall of deliciousness, and you immediately want to empty your entire bank account into their till when you see the display cases full of every kind of chocolate-y treat you can imagine. I was, almost quite literally, a kid in a candy shop.

We had a great visit with Kim, got a full tour of their operation, and she even sent me home with a recipe to share with all of you for a treat they make at the shop.

This stuff is not only easy to make but delicious, too. It’s a perfect treat for the upcoming holiday snack table. The only alterations I made was to pare this recipe down, since Kim is used to making everything in bulk.

Print

Avalanche Bark

Avalanche bark has a great texture, with crunchy rice cereal, fluffy marshmallows and chocolate chunks, along with the flavor of peanut butter.
Course Dessert
Keyword chocolate, crisp rice cereal, marshmallows, no bake, peanut butter, Sweet Granada

Ingredients

  • 22 ounces white chocolate or vanilla almond bark
  • 1 1/2 cups plus 3 tablespoons creamy peanut butter
  • 1/2 cup mini marshmallows
  • 1/4 rounded cup crisp rice cereal
  • 1/2 cup chocolate chunks I used bittersweet

Instructions

  • Prepare a nine-by-13-inch baking dish by lining it with parchment paper.
  • In a microwave-safe bowl, melt the almond bark, heating 30 seconds at a time and stirring in between, until it is all melted. Stir in the peanut butter.
  • Once everything is smooth, stir in the marshmallows, cereal and chocolate chunks.
  • Spread the mixture evenly into the prepared pan. Sprinkle with a few more toppings, if desired.
  • Let the mixture cool completely on the counter or in the refrigerator and then cut into squares. Store in an airtight container.

This stuff was great. It was rich and had a fantastic texture. I had to immediately give away as much of the batch as possible to keep from eating the entire pan myself.

Plus, I had other goodies from The Sweet Granada that I needed to spend my calories on. (I highly recommend the dark chocolate pretzel caramel bar. That was my favorite.)

If you’re ever in Emporia, I highly recommend your own field trip to The Sweet Granada at 803 Commercial St. And if you can’t make it over there, get online and do your sweets shopping that way—they ship! You can find them at https://sweetgranada.com/. Locally made treats are a great gift for those hard-to-buy-for folks, or you can just let a group of experts make your holiday treats for you and save yourself some time and energy this year.

I love getting the chance to see how different small businesses do their thing around our state, and it was so fun to meet Kim and see her adorable shop and taste her delicious goodies.

That will definitely not be my last visit to The Sweet Granada. Joey just better watch out, because next time, it won’t be a field trip—it’ll be a shopping trip.

This piece first appeared in print on Nov. 4, 2021.

Spice Up Your Life is a weekly newspaper column written by Lindsey Young in south central Kansas. If you are interested in sponsoring this column, please contact us through the “Contact Lindsey” link at the top of the page.

Categories
Breakfast Dessert

Pumpkin spice donuts make for a ‘gourd’ fall recipe

Pumpkin spice donuts are extremely easy to make, only using two ingredients: a cake mix and a can of pumpkin puree.

One of the pieces of advice you get if you ever put your house on the market is to bake cookies before a showing so that your home feels more inviting.

When we had a house on the market several years ago, our real estate agent also banned us from cooking anything too pungent—like curry or fish—lest we end up with the opposite problem.

I was on board with the fish rule, but if it were up to me, I think the curry smell would attract me more than repel me from a house. To each his own, I guess.

I thought about that advice this week after making this week’s recipe for pumpkin spice donuts. Our whole house immediately just smelled like fall—comforting and inviting.

If you don’t tend to be a baker, this is the recipe for you. All you need is a donut pan and two ingredients, and you can have some amazing donuts in no time.

I found this recipe on the blog “The Suburban Soapbox.” You can find the original post at https://thesuburbansoapbox.com/two-ingredient-baked-pumpkin-spice-donuts/. I didn’t make any changes to the recipe, since it’s only two ingredients, but I did leave off the powdered sugar glaze the original post suggested. These were moist, flavorful and plenty sweet without it.

Print

Pumpkin Spice Cake Donuts

Pumpkin spice donuts are extremely easy to make, only using two ingredients: a cake mix and a can of pumpkin puree.
Course Breakfast, Dessert
Keyword cake mix, donuts, pumpkin, spice cake

Ingredients

  • 15.25- ounce spice cake mix
  • 15 ounces pumpkin puree

Instructions

  • Preheat the oven to 350 degrees, and prepare a donut pan by lightly spraying the wells with cooking spray.
  • In a mixing bowl, combine the cake mix and pumpkin puree until the mixture is smooth (it will be thick).
  • Spoon your filling into the wells (or use a piping bag, as the original recipe author suggests, if you want your donuts to look more uniform and not have rough edges). I filled my wells to the tops.
  • Bake for 10 to 15 minutes or until a toothpick inserted in the donuts comes out clean.
  • Let the donuts cool and then remove them from the pan, running a knife around the edges of each, if necessary, to loosen them. Store the finished donuts in an airtight container.

These were so, so easy and made a moist, delicious donut, too. The only “hard” part was that since I only have a six-well donut pan, I had to go in batches to get my donuts done. I managed to get a dozen out of this recipe.

That same day, I decided to make some chili in my crockpot, and I ate a donut along with my bowl that evening. It wasn’t quite the same as a cinnamon roll, but it was a great companion. They were also phenomenal along with a cup of coffee for breakfast.

I hope I don’t have to move from our current house any time soon (like never, ever, ever), but if I do have to put a house on the market again, I’m going to remember this recipe as a great air freshener. It’s quick, easy and smells and tastes fantastic.

Plus, if you don’t end up with any offers on your house, at least you have donuts to drown your sorrows.

This piece first appeared in print on Oct. 28, 2021.

Spice Up Your Life is a weekly newspaper column written by Lindsey Young in south central Kansas. If you are interested in sponsoring this column, please contact us through the “Contact Lindsey” link at the top of the page.

Categories
Cookies Dessert

Nothing is ‘butter’ than simple-to-make cookies

The recipe for these butter cookies uses only three ingredients but still yields crispy, delicious cookies, perfect for a snack with a cup of hot coffee or tea.

One of my favorite Internet memes is a photo of a blue Royal Dansk butter cookies tin.

The caption reads, “Why are there cookies in Grandma’s sewing kit?” It always makes me smile, mostly because I’m glad I wasn’t the only child who was fooled by the reuse of a cookie tin for storage.

What can be more disappointing than discovering thread and buttons in a place where you thought you might find a snack?

There is something great about a butter cookie. They have that hint of sugar, are a little crunchy and they are highlighted with that deep, satisfying flavor of real butter.

Whenever they’re around at Christmastime, I find them irresistible, and I’m clearly not alone, since this week’s recipe is actually originally from a viral video. The video features butter cookies made quickly and easily with only three ingredients: butter, sugar and flour.

Of course, I had to give it a try.

I found this recipe on a website called “I Love My Recipes.” You can find the original at https://ilovemyrecipes.com/these-brilliant-cookies-are-taking-the-internet-by-storm-3-ingredients-and-ready-in-no-time/. This was such a simple recipe, I didn’t add anything to my version.

Print

Three-ingredient Butter Cookies

The recipe for these butter cookies uses only three ingredients but still yields crispy, delicious cookies, perfect for a snack with a cup of hot coffee or tea.
Course Dessert
Keyword butter, cookies, simple

Ingredients

  • 3/4 cup butter softened
  • 1/2 cup sugar plus more for sprinkling
  • 2 1/4 cups flour

Instructions

  • In a mixing bowl, beat all three ingredients together to form a crumbly dough.
  • Dump the dough out onto a countertop or piece of waxed paper and squish it together into a log about two inches in diameter.
  • Roll the dough in sugar and wrap it in plastic wrap. Refrigerate it for 30 minutes.
  • Preheat the oven to 320 degrees, and slice the log into about 3/4-inch slices. Place them an inch apart on a baking sheet and bake for 20 minutes. They will spread out a little but won’t get overly brown—just around the edges.
  • Let the cookies cool completely on the baking sheets before transferring them to an airtight container.

Don’t be discouraged if your dough doesn’t come together immediately. It takes a little effort to get it to finally stop flaking apart and stick together—just keep messing with it.

These cookies aren’t overly sweet and are absolutely delicious dunked into a cup of coffee. If you wanted them to be a bit sweeter, you could coat the sliced cookies in sugar before baking them, too.

The recipe only made about one and one-half dozen cookies, the perfect amount if you’re just looking to satisfy your sweet tooth without too much temptation.

Unfortunately, I didn’t have a blue tin on hand to put my cookies in, but I think I’ll still enjoy them just as much, even if I don’t have a new storage place for my needles and bobbins when my cookies are all gone.

This piece first appeared in print on Sept. 23, 2021.

Spice Up Your Life is a weekly newspaper column written by Lindsey Young in south central Kansas. If you are interested in sponsoring this column, please contact us through the “Contact Lindsey” link at the top of the page.

Categories
Cookies Dessert

There’s no ‘matcha’ for tea-flavored cookies

White chocolate chip and cashew matcha cookies have the subtle taste of tea, along with the sweetness of chocolate and the crunch of nuts.

It seems like everyone has an extravagant friend. 

The person in your life who likes the finer things, the fancier stuff, the flashy side of life.

I have a few, but one who truly fits this description recently looked at me and said, “You know what’s delicious? White chocolate chip matcha cookies.”

Challenge accepted.

If you’re not familiar with matcha, it’s a green powder made from tea leaves. It’s purported to be a healthier tea option, since it uses the whole leaf instead of just steeping them, and while it’s popular in places like Japan, it’s also become more and more available in the States, especially at coffee shops and smoothie bars.

It has a very earthy flavor, one the author of this recipe described as kind of like grass, but I’d say it really just smells and tastes like green tea. It does, however, make a great addition to some white chocolate chip cookies.

This recipe comes from Zainab Moughal, who writes the blog “Bake with Zainab.” You can find the original post at https://bakewithzainab.wixsite.com/bakewithzainab/post/matcha-cashew-white-chocolate-nyc-cookies. I added extra vanilla, chocolate chips and matcha in my version.

Print

White Chocolate Chip and Cashew Matcha Cookies

White chocolate chip and cashew matcha cookies have the subtle taste of tea, along with the sweetness of chocolate and the crunch of nuts.
Course Dessert
Keyword cashews, cookies, matcha, vanilla, white chocolate chips

Ingredients

  • 1/2 cup brown sugar
  • 1/3 cup sugar
  • 1/2 cup butter
  • 1 egg
  • 2 teaspoon vanilla
  • 1 3/4 cups flour
  • 2 heaping teaspoons matcha powder
  • 1 1/2 teaspoons baking powder
  • 1/2 teaspoon baking soda
  • 1/2 teaspoon salt
  • 2/3 cup chopped cashews
  • 11 ounces white chocolate chips

Instructions

  • Cream together the brown sugar, sugar and butter for a few minutes until the mixture is light and fluffy. Beat in the egg and vanilla.
  • Beat in the flour, matcha powder, baking powder, baking soda and salt until the mixture is smooth, and then fold in the cashews and white chocolate chips.
  • Scoop the batter with a 1-1/2-inch cookie scoop (or about the size of a ping pong ball) and place onto a baking sheet—no need to space them very far.
  • Freeze the cookies on the baking sheet for one hour.
  • Preheat the oven to 395 and line baking sheets with parchment paper. Place the frozen dough at least two inches apart and bake for nine minutes or until the tops are starting to brown.
  • Let the cookies cool, and then store them in an airtight container.

These didn’t have a really strong matcha flavor, but it was there in the background. If you wanted it to stick out more, you could decrease the chocolate chips or leave them out altogether. I thought they were really good, though. They’d be great with a hot cup of tea.

And I made sure to bag some up for my friend, figuring he would be able to tell me if I managed to accomplish his vision for a good matcha cookie.

I’m sure the fact that I see green powdered tea as a fancy addition to my baking is a sign that I need to get out more. Either that, or I need to live a little and ask for that additional charge at the coffee shop every once in awhile. I think my friend would probably agree with both.

This piece first appeared in print on Sept. 16, 2021.

Spice Up Your Life is a weekly newspaper column written by Lindsey Young in south central Kansas. If you are interested in sponsoring this column, please contact us through the “Contact Lindsey” link at the top of the page.

Categories
Dessert

Baking cobbler outdoors can be ‘berry’ satisfying

This cobbler, made from fresh peaches and blueberries, is a perfect summer dessert that can be made in the oven or out on the grill or smoker.

Thanks to the Newton Rotary Club’s annual peach fundraiser and my three-year-old niece insisting that I buy blueberries for our recent fun day, I had quite a bit of fruit in my refrigerator this week.

That, combined with Joey itching to use a cast iron Dutch oven he recently got for his smoker, meant we were going on a new adventure of baking outdoors.

After a fruitless (pun intended) search for a recipe that I liked using both peaches and blueberries, I finally decided to combine two in my search for the perfect smoked cobbler, and the final product definitely did not disappoint.

One recipe I used is from “The Grateful Girl Cooks” (https://www.thegratefulgirlcooks.com/berry-cobbler-traeger-grill-style/), and the other is Steven Raichlen’s “Barbecue Bible” site (https://barbecuebible.com/recipe/smoky-bourbon-peach-cobbler/). I added extra vanilla and cinnamon to my version.

Print

Smoked Blueberry Peach Cobbler

This cobbler, made from fresh peaches and blueberries, is a perfect summer dessert that can be made in the oven or out on the grill or smoker.
Course Dessert
Keyword blueberry, bourbon, brown sugar, cinnamon, cobbler, grilled, peaches, smoker, vanilla

Ingredients

Topping Ingredients

  • 2 cups flour
  • 2 teaspoons baking powder
  • 1 teaspoon baking soda
  • 1/4 cup sugar
  • 1/2 teaspoon salt
  • 8 tablespoons butter cold
  • 1 1/3 cups buttermilk I used skim with a dash of vinegar
  • cinnamon for sprinkling

Peach Filling Ingredients

  • 1 1/4 cups brown sugar
  • 1/4 cup bourbon
  • 2 tablespoons maple syrup
  • 1 teaspoon vanilla
  • 2 tablespoons flour
  • 2 teaspoons cinnamon
  • 1 tablespoon lemon juice
  • 6 cups peaches cut into one-inch pieces

Blueberry Filling Ingredients

  • 18 ounces blueberries
  • 1 cup brown sugar
  • 1/8 teaspoon salt
  • 1 tablespoon lemon juice
  • 2 teaspoons vanilla

Instructions

  • Preheat your grill, smoker or oven to 350 degrees. If you’re using a grill, you’ll want to bake over indirect heat.
  • For the grill or smoker, prepare a cast iron skillet or Dutch oven and for the oven, a 9×13-inch baking dish, by coating the inside with butter and set it aside.
  • For the topping, combine the flour, baking powder, baking soda, sugar and salt in a bowl and then cut in the butter with a fork until the mixture is crumbly. Stir in the buttermilk and set the topping aside.
  • In another bowl, combine all the ingredients for the peach filling, except the peaches. Once they are all incorporated, fold in the peaches.
  • Finally, for the blueberry filling, combine all the ingredients in a bowl and stir gently until the blueberries are well coated in the mixture.
  • To assemble the cobbler, start with about half of the peach filling, layer in the blueberries and then finish off with the rest of the peaches. Using a spoon or ice cream scoop, drop the topping by the spoonful evenly over the top of the fruit. Don’t worry if there’s still some fruit visible. Sprinkle cinnamon over the top of the cobbler.
  • Bake on your smoker/grill/oven for 30 to 40 minutes or until a toothpick inserted into the topping comes out clean. Ours ended up going quite a bit longer on our smoker, so be ready for the time to vary.

This was absolutely delicious. The topping took on a subtle smoky flavor that was majorly complimented by the cinnamon, syrup and brown sugar, not to mention the bourbon, which added a nice, subtle flavor to the background.

Actually, speaking of the bourbon, if that’s not your cup of tea, you might try adding a combination of water and more vanilla extract instead.

We ate our cobbler with scoops of vanilla ice cream and enjoyed our dessert outdoors until the mosquitos drove us back inside. There are few flavors like peaches and blueberries to really help you enjoy a summer evening, and being able to cook it right on the grill makes it even more special.

This piece first appeared in print on Aug. 26, 2021.

Spice Up Your Life is a weekly newspaper column written by Lindsey Young in south central Kansas. If you are interested in sponsoring this column, please contact us through the “Contact Lindsey” link at the top of the page.

Categories
Dessert

Family pie recipe is ‘choc’ full of flavor

This chocolate pie is a family recipe, passed to Adam Strunk by his mom, Ruth. It features lots of dark chocolate flavor, along with a light, fluffy meringue topping.

Several years ago, Danielle Oteri wrote a column for the website “Good Food Stories,” where she explored the differences in personality between her friends and family who preferred to cook, versus those who preferred to bake.

It’s a fun read, if you get the chance (goodfoodstories.com/the-psychology-of-baking), but one quote from her friend Melissa resonated with me from a baking experience I had this past week: “Baking [also] has seemed to me to be chemistry, while cooking is like art,” she said. “Art you can taste as you go—and for me, that’s a big part of it. I like to stick my fingers, er, spoon, into whatever I am cooking and taste at every step.”

Adam Strunk, who is the managing editor of Harvey County Now, was asked to be a celebrity baker for a charity pie auction last week, but Adam is most definitely a cook.

He’s an improviser and follows his instincts in the kitchen. If you ask Adam for a recipe, he’ll give you vague lists of ingredients, not amounts. And he makes darn good food.

So he found himself a bit intimidated by pie, which is why he asked me, the baker, to come make sure the recipe he chose turned out.

That was not only because he’s super competitive and wanted to create a great pie for the auction but also because he chose a family recipe, one his grandmother and mother made only for special occasions. I was only too happy to give the fly-by-the-seat-of-his-pants cook a lesson in pie dough and patience.

So, the only source I can give you for this week’s recipe is Ruth Strunk, Adam’s mom. I can’t tell you if she would have considered herself a cook or a baker, but I can tell you after this experience that she could make one mean pie.

Print

Ruthie’s Chocolate Pie

This chocolate pie is a family recipe, passed to Adam Strunk by his mom, Ruth. It features lots of dark chocolate flavor, along with a light, fluffy meringue topping.
Course Dessert
Keyword chocolate, meringue, pie

Ingredients

Pie Ingredients

  • 9- inch pie shell baked
  • 2/3 cup sugar
  • 1/2 cup flour
  • 2 2/3 cups milk we used whole
  • 1/4 teaspoon salt
  • 1 tablespoon butter
  • 1 teaspoon vanilla
  • 4 egg yolks beaten
  • 3 ounces unsweetened chocolate we used Ghirardelli

Meringue Ingredients

  • 3 egg whites
  • 4 tablespoons sugar
  • 1/4 teaspoon baking powder
  • pinch of salt

Instructions

  • Pre-bake your pie shell and place it to the side for when the filling is complete.
  • In a bowl, combine the sugar, flour, milk, salt, butter and vanilla. It doesn’t have to be perfectly combined, just mostly mixed together and set aside.
  • In another bowl, beat your egg yolks and set aside.
  • Heat a double boiler and melt the chocolate in the top, being careful to stir it constantly so it doesn’t burn.
  • Once the chocolate is melted, add the sugar mixture and continue stirring with a whisk for 10 minutes in the double boiler.
  • After 10 minutes, add about one cup of the chocolate to the egg yolks, beating them together, then add the egg mixture to the double boiler, continuing to whisk constantly for another five minutes.
  • Remove the mixture from the heat and let it cool for about five to 10 minutes, then pour it into your prepared pie shell, smoothing it out evenly, and set it aside.
  • For the meringue, preheat the oven to 350 degrees.
  • Add the egg whites to a mixing bowl and beat until they are very stiff. Add in the sugar, baking powder and salt and beat again. Spread the meringue over the top of the filling. Using a knife, create some peaks in the meringue to create a nice pattern when it browns.
  • Bake until the meringue is light brown. (I think ours took about 10 minutes. Just keep watching it.)
  • Refrigerate the pie until you’re ready to serve it.

According to Adam, we managed an excellent recreation of his mom’s classic, and it was delicious—perfectly chocolatey without being too sweet.

We didn’t earn the highest bid at the auction, but Adam’s pie still managed a very nice sum and got great reviews.

I don’t think Adam is quite ready to turn in his reporter’s notebook for a rolling pin, but I do think he’s less nervous about pie crust. Now, if I can just get him to pay attention to what he throws in the pan while cooking, I might have a few more great Stunk recipes to share.

This piece first appeared in print on Aug. 19, 2021.

Spice Up Your Life is a weekly newspaper column written by Lindsey Young in south central Kansas. If you are interested in sponsoring this column, please contact us through the “Contact Lindsey” link at the top of the page.

Categories
Dessert

Peaches and fresh ginger will help you snap into August

Ginger peach crisp combines the fresh flavor of summer peaches with spicy, fresh ginger to create the ultimate dessert.

If anyone can tell me the trick to pitting a firm peach, I’m all ears.

So far, my strategy includes cutting numerous slits down the sides, grunting and murmuring regrets under my breath while trying to pull the first slice off, and I can tell you that it doesn’t work all that well.

Luckily, the recipe I tried this week included cutting the peaches into bite-sized pieces, so when some of mine ended up looking a bit rough, they still looked gorgeous in the finished dessert.

Joey and I decided to have a Christmas in July get together last weekend. The meal was loosely based around Christmas meals, with pulled pork on Hawaiian rolls, German potato salad, lots of other delicious dishes, and a yuletide-inspired dessert of a fresh ginger peach crisp.

I figured ginger was a good nod to the holidays, and with peaches coming into season, they were an homage to summer.

And, of course, we had to pair it with some great vanilla ice cream. I was able to pick up a couple pints from our local ice cream expert, Salted Creamery. You can find them online at saltedcreamery.com if you want to place an order or find a store where you can buy it. (That’s not a sponsored endorsement; I just really think they do excellent work.)

The recipe I tried this week comes from the blog “Nutmeg Nanny.” You can find the original post at https://www.nutmegnanny.com/ginger-peach-crisp/. I added extra spices and vanilla in my version.

Print

Ginger Peach Crisp

Ginger peach crisp combines the fresh flavor of summer peaches with spicy, fresh ginger to create the ultimate dessert.
Course Dessert
Keyword cinnamon, crisp, ginger, peaches, vanilla

Ingredients

Topping Ingredients

  • 1/2 cup quick oats
  • 1/3 brown sugar
  • 1/4 cup flour
  • 4 tablespoons butter softened
  • 1/2 teaspoon baking powder
  • 1/2 teaspoon cinnamon
  • 1/2 teaspoon ground ginger
  • pinch of salt

Filling Ingredients

  • 2 pounds fresh peaches cut into bite-sized pieces
  • 1/3 cup brown sugar
  • 1 tablespoon lemon juice
  • 1 tablespoon fresh ginger peeled and grated
  • 4 teaspoons vanilla extract
  • 1 1/2 teaspoons cornstarch

Instructions

  • Preheat the oven to 425 degrees. Spray an eight-by-eight-inch baking dish with cooking spray and set aside.
  • In a mixing bowl, combine the topping ingredients until everything is well incorporated. Set it aside.
  • In another bowl, combine all of the filling ingredients, stirring to coat the peaches. Pour the filling into the prepared pan and then sprinkle the topping evenly over the peach mixture.
  • Bake for 25 minutes.
  • Serve warm for best results, along with your favorite vanilla ice cream, and refrigerate any leftovers.

The fresh ginger added great flavor to this crisp. It has a nice spiciness that is especially delicious with ice cream. I doubled the recipe for our group, and I didn’t end up with a lot of leftovers.

It also came together quickly. Or, I guess it would have if I knew how to pit a peach properly.

As they really come into season, I’ll have to pick out riper peaches, and if I can’t, I might also need somebody to recommend a good place for me to take up weightlifting.

This piece first appeared in print on Aug. 5, 2021.

Spice Up Your Life is a weekly newspaper column written by Lindsey Young in south central Kansas. If you are interested in sponsoring this column, please contact us through the “Contact Lindsey” link at the top of the page.

Categories
Dessert

Come out of your shell with pistachio cake

Pistachio cake uses a cake mix and pudding mix, along with chopped pistachios to create a nutty, light dessert.

I normally like to start this column with a story about the week’s recipe, but I have to tell you about my most recent kitchen fail. It’s a doozy.

My parents-in-law gifted us with several packages of frozen tamales that are made by simply boiling the bag for 20 minutes and then serving. They’re great for quick meals. A few don’t have labels on them, so they’ve been a fun surprise when we open up the bag.

I made one of the surprise bags this week, added some Mexican rice and tomatillo salsa to the plate and served it up.

Joey took his first bite, and his face screwed up in an awful grimace.

“These are sweet,” he said, through a mouthful.

Guys. They were apple cinnamon tamales!

I felt awful for ruining our lunch, but Joey, being the trooper he is, scraped the salsa into the rice, ate that first and declared that his slightly spicy apple tamales would be for dessert.

I guess even “easy” meals can take a turn for the worse.

This week’s recipe is one of those easy recipes, but hopefully, you’ll have labels to read, and everything will turn out great.

The recipe I used doctors up a cake mix to make a delicious cake. It comes from the blog “Cake Whiz.” You can find the original post at https://cakewhiz.com/pistachio-cake-recipe/. I added chopped nuts, vanilla and salt to my recipe, as well as simplified the topping.

Print

Pistachio Cake

Pistachio cake uses a cake mix and pudding mix, along with chopped pistachios to create a nutty, light dessert.
Course Dessert
Keyword cake, cake mix, pistachios, pudding mix

Ingredients

  • 3 eggs
  • 3/4 cup oil I used canola
  • 1 cup milk I used skim
  • 1 tablespoon vanilla
  • 1 yellow cake mix
  • 3.4 ounces instant pistachio pudding mix
  • pinch of salt
  • green food coloring optional
  • 1/2 cup chopped pistachios divided
  • 8 ounces frozen whipped topping thawed

Instructions

  • Preheat the oven to 350 degrees. Prepare a nine-by-13-inch baking pan by greasing and flouring it, and set it aside.
  • In a large mixing bowl, beat the eggs, oil, milk and vanilla until it’s smooth. Beat in the cake mix, pudding mix and salt. If you want to make your cake a bit greener, add some green food coloring, too.
  • Add 1/4 cup of the chopped pistachios to the mixture, and pour it into your prepared cake pan, spreading it out evenly.
  • Bake for 25 to 30 minutes or until a toothpick inserted in the center comes out clean.
  • Let the cake cool, and then top it with the whipped topping and the rest of the chopped pistachios.
  • Refrigerate any leftovers.

This was fantastic. It was a great summer dessert, and it was really pretty, too. The cake was light and nutty, and we really enjoyed it.

And the good news is Joey knew exactly what he was getting into when he took the first bite, and I didn’t try to serve it to him with salsa on top.

I’m not sure if he’s going to trust a plate of tamales from me in the future, but at least my cake turned out fine.

This piece first appeared in print on July 22, 2021.

Spice Up Your Life is a weekly newspaper column written by Lindsey Young in south central Kansas. If you are interested in sponsoring this column, please contact us through the “Contact Lindsey” link at the top of the page.

Exit mobile version